—— This chapter helps you get started with PulseForce, from installation and login to connecting your Alpaca account and creating your first trading task.
1.1. Product Overview
PulseForce is an intelligent quantitative trading and backtesting platform designed for both individual and professional traders.
By providing built-in trading strategies, a task-driven execution engine, and automated hyper-parameter optimization, PulseForce helps you capture market opportunities more efficiently.
Key features:
Multiple Strategy Support
Built-in classic and practical quant strategies:- MA Crossover
- Bollinger Bands
- Donchian Channel
- Dual Moving Average
- KDJ Reversal
- MACD Trend
- Momentum
- RSI Reversal
Hyper-Parameter Optimization (HyperOpt)
- Supports multiple optimization objectives: Max Profit, Sharpe, Sortino, Calmar, etc.
- Automatically searches for the best parameter combination
- Best parameters can be applied to backtesting or daily automated tasks (in supported versions)
Fully Configurable Parameters
Freely adjust indicator settings, time windows, and risk control parameters to match different market conditions.Task-Driven Architecture
Run strategies as separate “Tasks”:- Backtest tasks
- Daily automated trading tasks (supported platforms only)
- Hyper-opt tasks
Pulse Signals Visualization
Every buy/sell signal generated by a strategy is recorded as a “Pulse”, helping you clearly see all trade triggers.Alpaca Account Integration (in full-featured versions)
- View account balance and positions
- Place manual buy/sell trades
- View order history
- Enable automated tasks for real trading execution
Energy System
Every task consumes energy points; additional energy can be purchased via IAP.
1.2. Download & Installation
1.2.1 For Android Users
You can install PulseForce in two ways:
Google Play Store
👉 https://play.google.com/store/apps/details?id=ai.hiforce.PulseForceEuDownload APK from the official website
- Homepage: https://pulse.hiforce.ai
- Latest APK (direct link):
👉 https://oss.hiforce.net/pulse/dl/pulse-force-universal-release-v2.1.7.apk
If Android shows “Install from unknown sources”, simply allow it temporarily.
1.2.2 For Apple iOS Users
iOS provides two installation options:
- PulseForce Lite (App Store, limited features)
- Full-featured PulseForce (install via AltStore/AltServer)
A) Install PulseForce Lite from the App Store
The App Store version is a Lite edition and does not include:
- ❌ Alpaca account binding
- ❌ Daily automated trading tasks
PulseForce Lite still supports:
- All built-in strategies
- Hyper-opt (for backtest usage)
- Fully configurable parameters
- Backtesting tasks
- Hyper-opt tasks
- Pulse signals visualization
- Energy system (IAP supported)
Ideal for strategy research and simulation.
B) Install Full-featured PulseForce via AltStore
If you want Alpaca binding and live automated trading on iOS, install PulseForce using AltStore / AltServer.
System Requirements
- Device: iPhone (iPhone 12 or newer recommended), iPad supported
- iOS Version: 15.0 or above
- Network: Stable Wi-Fi or 5G
- Computer: macOS or Windows with AltServer installed
Installation Steps
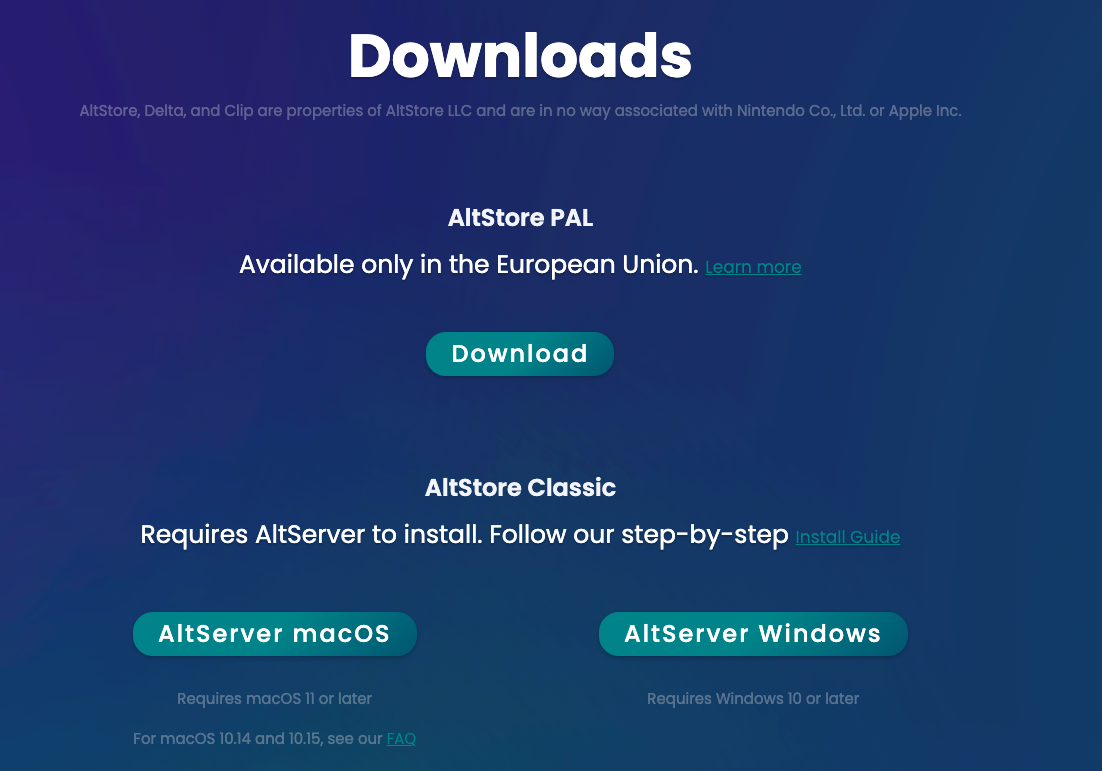
Step 1: Install AltServer on your computer
- Visit 👉 https://altstore.io/
- Download AltServer for macOS or Windows
- Install and ensure AltServer is running
- Check whether you are using AltStore PAL or AltStore Classic
(different versions require different source URLs later)
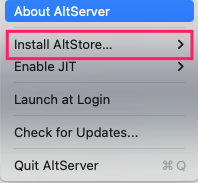
Step 2: Connect your device and install AltStore
- Connect iPhone/iPad to your computer
- In AltServer, click:
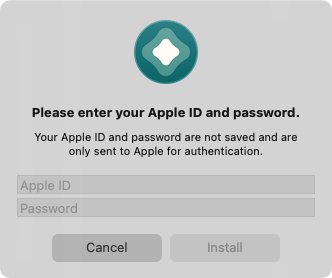
Install AltStore → Your Device - Enter the Apple ID/password used on the iPhone (for app signing)
Step 3: Trust the developer certificate
On your iPhone:
- Go to Settings → General → VPN & Device Management
- Find the profile associated with your Apple ID
- Tap Trust
Step 4: Add the PulseForce source and install the app
- Open AltStore on your device
- Go to Browse
- Tap + → Add Source
- Enter the source URL according to your AltStore version:

For AltStore PAL users:
1 | https://pulse-dl.hiforce.ai/pulseforce/source.json |
For AltStore Classic users:
1 | https://pulse-dl.hiforce.ai/pulseforce/source-classicial.json |
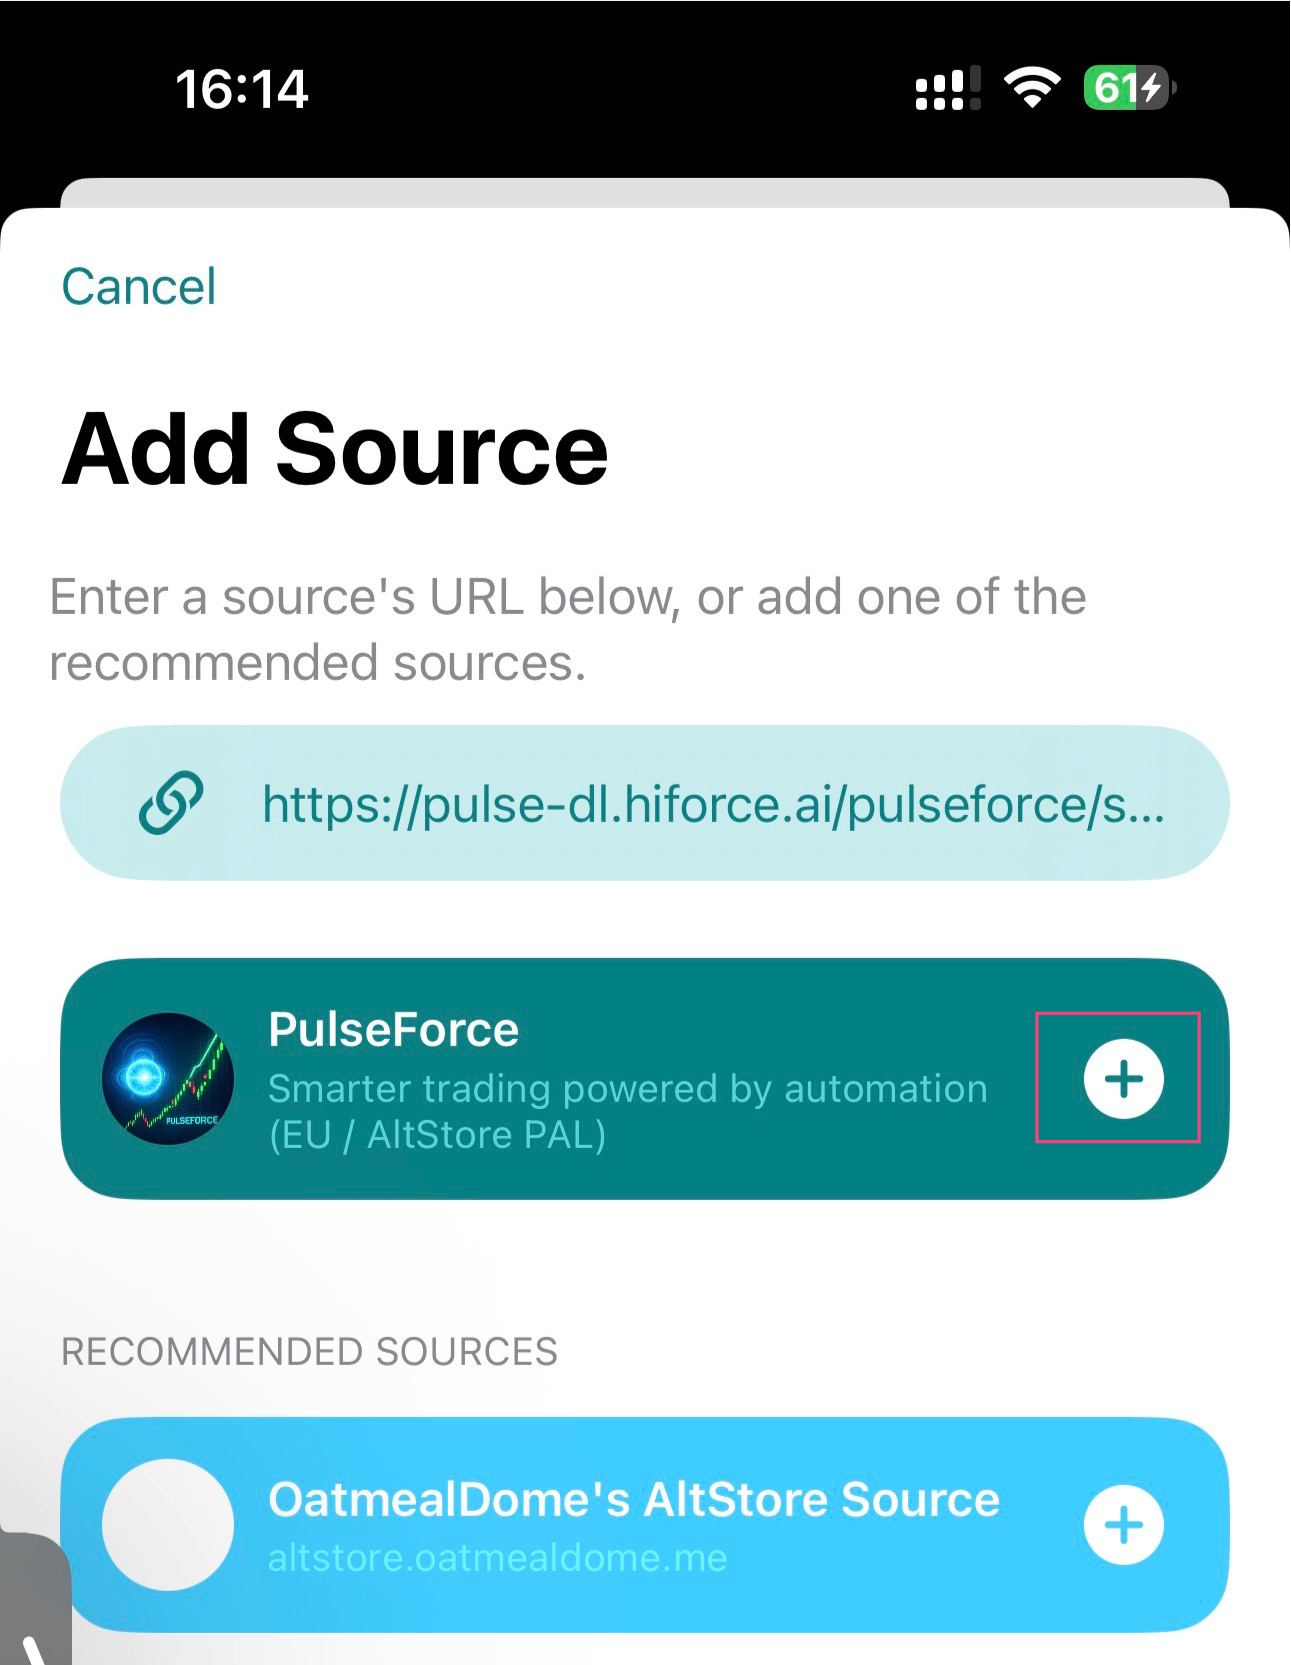
- After adding the source, PulseForce will appear in the list
- Tap Install
- After installation, PulseForce will appear on your home screen
Step 5: Keeping PulseForce active
- Free Apple ID → apps must be refreshed every 7 days
- AltStore will auto-refresh if:
- Your computer and phone are on the same Wi-Fi
- AltServer remains running
- With AltStore PAL paid subscription, the certificate is valid for 1 year
1.3. Login (Apple / Google / Email)
PulseForce supports:
- Sign in with Apple
- Sign in with Google
- Sign in with Email
You must log in before entering the main UI.
1.3.1 Login Flow
- Launch the app → login screen appears
- Select:
- Apple login
- Google login
- Email login
- Complete system-provided authentication
- Automatically return to PulseForce
- Login state is saved locally
1.3.2 Apple Login
- Tap Sign in with Apple
- Choose:
- Share real email
- Or Hide My Email
- Complete two-factor authentication if enabled
- Apple may provide name during first authorization
- Done — logged in
1.3.3 Google Login
- Tap Sign in with Google
- Choose an account or log in manually
- Complete two-step verification (if enabled)
- Grant minimal permissions
- Done — logged in
1.3.4 FAQ
Q1: Why must I log in first?
Because tasks, strategies, HyperOpt records, and energy points are all cloud-synced.
Q2: Can I skip login?
No.
Q3: Can I use the same account on multiple devices?
Yes — Apple / Google / Email login supports cross-device sync.
1.3.5 Privacy & Security
- We never store your third-party passwords
- Only minimal identifiers (ID & email) are received
- You may revoke authorization at any time
1.3.6 Logout
Go to:
Me → Settings → Account → Log Out
1.4. Connecting Your Alpaca Account (Full Version Only)
The App Store Lite version does not support Alpaca binding.
After logging in, supported versions (Android + AltStore iOS) will ask you to bind your Alpaca trading account.
You will need:
- Access Key (API Key ID)
- Secret Key
Some Alpaca features, such as increased rate limits or full historical data, may require upgrading to Algo Trader Plus.
Reference: https://alpaca.markets/data
1.4.1 Why bind Alpaca?
PulseForce is not a broker.
All real trading is executed via your own Alpaca account.
Once bound:
✔ View account balance
✔ View positions
✔ View order & trade history
✔ Submit buy/sell orders
✔ Run automated tasks on your account
Important Security Note:
Your API keys cannot perform:
- fund withdrawals
- bank transfers
- password changes
- modifying security settings
Funds remain secured and protected by Alpaca.
Full API list: https://docs.alpaca.markets/
1.4.2 How to retrieve Access Key & Secret Key
- Log into https://alpaca.markets/
- Open API Keys
- Create (or regenerate) a key pair
- Copy:
- API Key ID (Access Key)
- Secret Key
Secret Key is shown only once — store it securely.
1.4.3 Binding in PulseForce
- In PulseForce, go to:
Me → Settings → Alpaca Account - Enter Access Key & Secret Key
- Tap Bind Account
- The app will verify the keys with Alpaca
- On success, you will see:
- Account balance
- Positions
- Order history
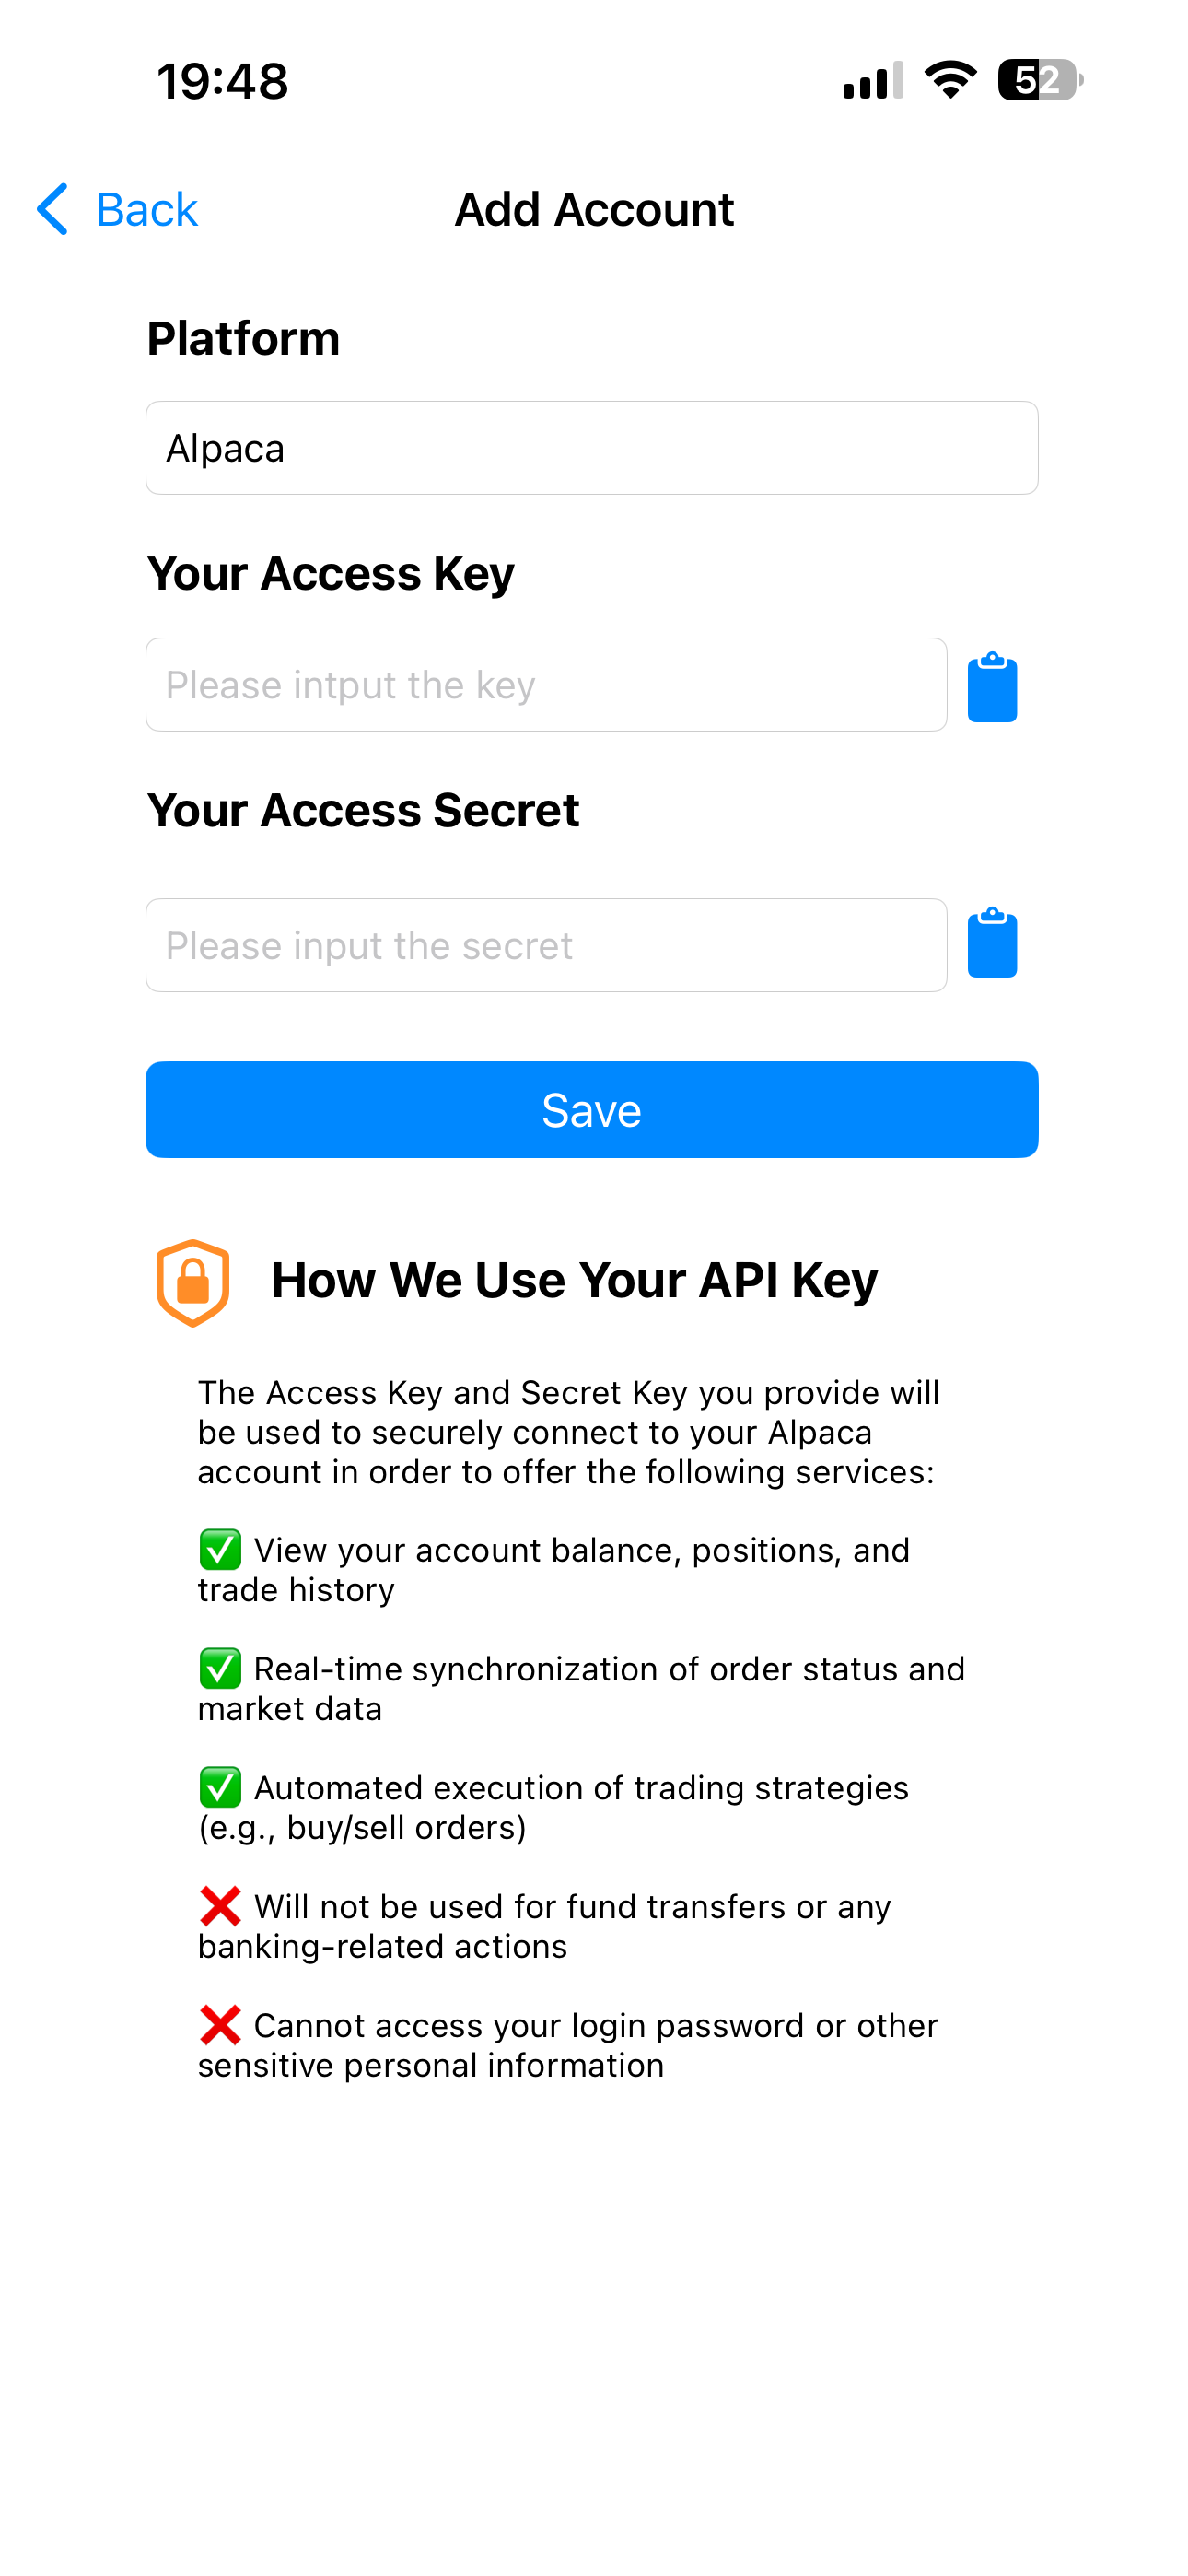
1.4.4 FAQ
Q1: Why must I bind before trading?
Because real trades are executed via Alpaca, not PulseForce.
Q2: Can PulseForce see my funds?
Only the balance & positions (read-only).
No withdrawal or transfer permissions.
Q3: Can I switch accounts?
Yes — unbind & rebind anytime.
Q4: Binding failed?
Check:
- Key typo
- Key expired
- Paper vs Live account mismatch
- Market permissions enabled
1.4.5 Key Security
- Keys stored only on your device
- Not stored on external servers
- Recommended:
- Rotate keys periodically
- Revoke suspicious keys
- Avoid inputting keys on shared devices
1.5. Create Your First Quant Task (Example)
After installation, login, and optional Alpaca binding, you can create your first task.
Example: Backtest Task
- Open Tasks / Backtest Center
- Tap New Task
- Choose:
- Strategy (e.g., MA Crossover)
- Symbol (AAPL, TSLA, etc.)
- Time range (past 60/90 days)
- Configure parameters
- Tap Start Backtest
- Review:
- Equity curve
- Drawdown
- Trade list
- Pulse signals
If satisfied, you can:
✔ Save parameters as a Template
✔ (Full version) Create a Daily Automated Task based on these parameters
You have now completed the full workflow:
Install → Log in → (Optional) Bind Alpaca → Create a task
Next steps:
- Explore more strategies
- Use HyperOpt to find optimal parameters
- Build your multi-strategy quant portfolio 🚀